

Built on the ATOM ecosystem, Celestia and its modular blockchain model has launched on the testnet in the quietest of times. This is the occasion to realize that we had not yet built a guide to allow the most curious among you to technically experiment one of the most innovative protocols of Web3. If you’re a bit lost when faced with the multiple Web3 blockchains that all hope to revolutionize the way we approach blockchains, don’t panic: today I’m presenting a technical detail of Celestia. Ready to get your hands dirty and run your own Celestia validator node on the recently launched Mamaki testnet? Here we go, I’ll explain it all to you!
The technical functioning of the Celestia network
Celestia has a very specific architecture. Traditionally, the design model of blockchains couples consensus mechanism and transaction execution. One approach to improving their scalability relies on sharding, i.e., the fragmentation of the data comprising the main chain.
With Celestia, the two layers – consensus and execution – are separated. The role of the consensus mechanism is only to ensure that the block data are available. To do this, it uses data availability proofs (data availability proofs). The transactions are then executed out-of-chain : nodes no longer need to process them to ensure the validity of blocks.
The nodes sample randomly small portions of the blocks in the chain. This is quite similar to peer-to-peer file sharing (BitTorrent) where files are chopped up between network nodes.
Once the blockchain is fully sampled, we get the famous availability proofs of said data.
Contrary to ” traditional ” blockchains, Celestia is designed to provide evidence of data availability and consensus, not transaction execution. Celestia therefore relies on a network of lightweight nodes (allowing anyone to deploy a client in minutes) and full archiving and validation nodes (the type of node we will learn to deploy in this article).

Celestia ultimately provides a modular consensus and data availability layer for all blockchains. Celestia does not impose the communication method cross-chain used.
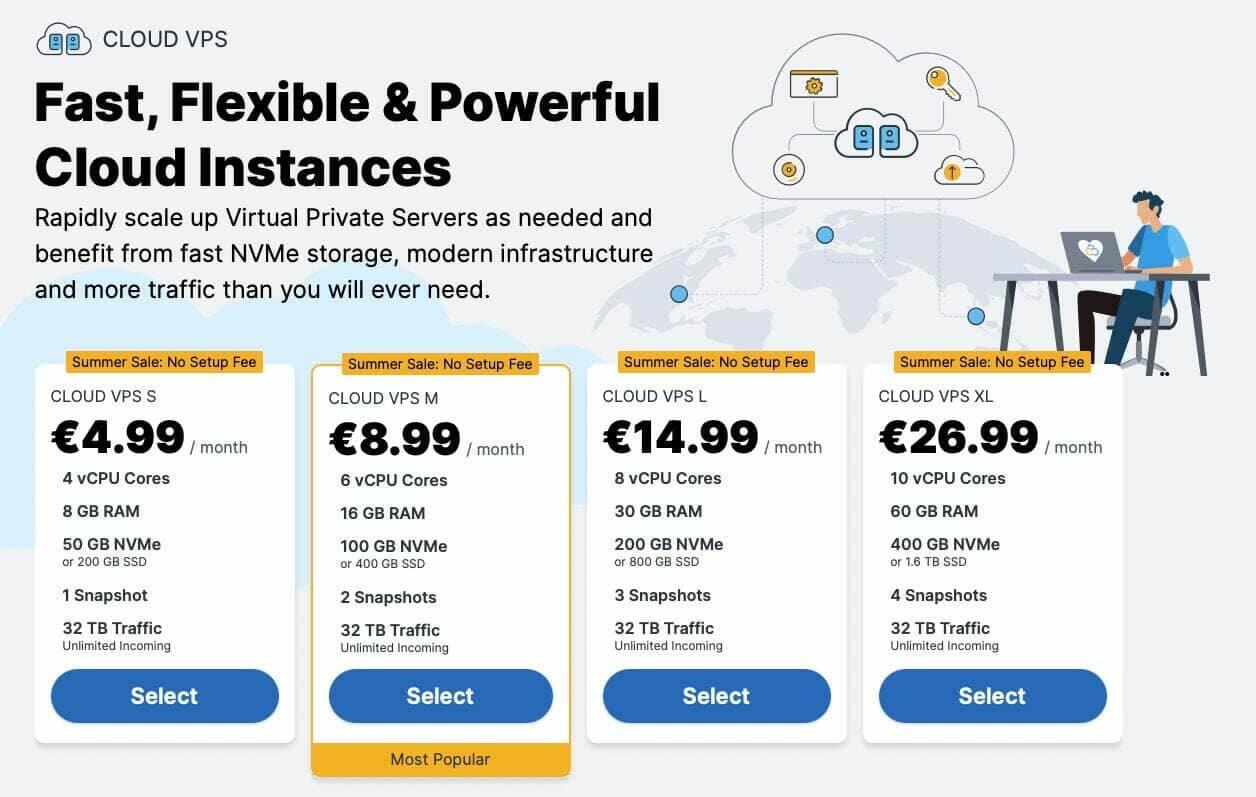
Run your Celestia node from a VPS
To begin with, and for your peace of mind, I advise you to get a VPS so you can operate more quietly. But what is a VPS, you may ask? Simply, it is a virtual network configured under the operating system of your choice, available for rent.
Why go through a VPS? For two main reasons: first, to be able to let your validator node run continuously (independent of your day-to-day use of your classic computer), and second, to more easily follow standardized tutorials using a classic Linux operating system (here, Ubuntu).
To make it simple and reliable, you can go look at the offers available on the side of OVH (but the proposed rates are prohibitive if you just want to try out testnet nodes).
If you just want to test the present tuto at a more reasonable price, you can turn to Contabo: the proposed product is on principle suitable for the basic use we will have in our tutorials and much cheaper than at OVH.
But beware: the quality of the infrastructure offered is clearly not the same, with possible worries about access to your VPS or untimely offline passages sometimes very long. So you’ve been warned: you’ll have to make a choice, with full knowledge of the facts 😉
To get started deploying a Celestia testnet node, start by connecting to your VPS server once it’s created and configured (allow an hour’s delay at OVH on weekdays, and one to three hours at Contabo). To do this, open a command terminal, and run the following command:
ssh[email protected]The login address and login to be filled in depends on the hosting company. The login, the connection address and the attached password are communicated by your host in a summary email. In my case for example, I had to type the following command:
ssh[email protected]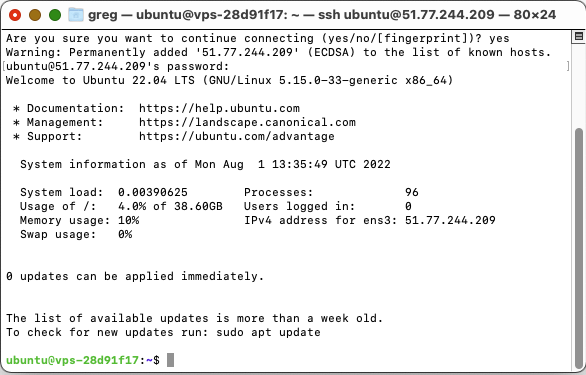
Now let’s get to the heart of the matter, we can get started!
Recover necessary utilities before launching
To get off to a good start, let’s grab and install the various tools that will be useful to us.
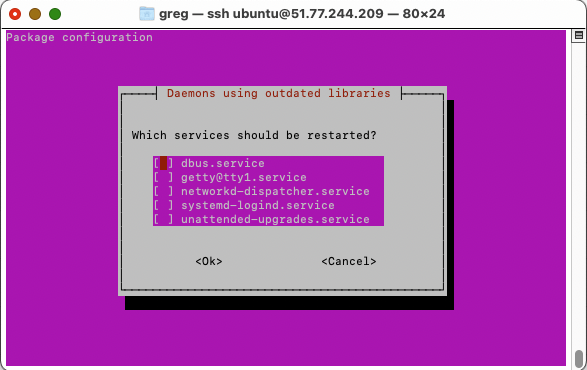
The VPS update messages when installing certain utilities
A little warning to start with: as you install the utilities and packages needed to deploy your Celestia node, the VPS you use may warn you that the installation system kernel (kernel) is not up to date. This is not a big deal!
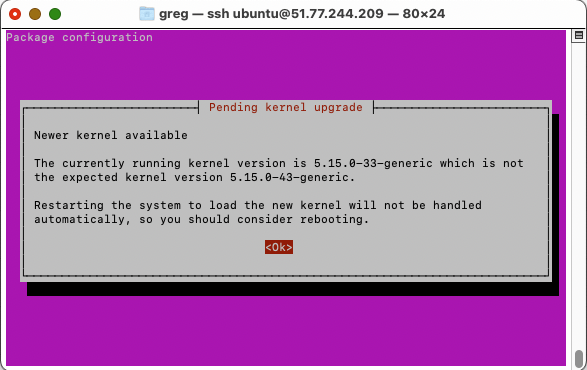
Simply validate the two screens that will be presented to you to continue your installations, letting the VPS restart the relevant services.
Now that you’ve been warned, let’s get to work!
Install the main utilities on your VPS
Run the following command in your terminal to update your installation, and retrieve the core utilities you will need for your Celestia node:
sudo apt update && sudo apt upgrade -y
sudo apt install curl tar wget clang pkg-config libssl-dev jq build-essential git make ncdu -y
Next, install go:
ver="1.18.2"
cd $HOME
wget https://golang.org/dl/go$ver.linux-amd64.tar.gz
sudo rm -rf /usr/local/go
sudo tar -C /usr/local -xzf "go$ver.linux-amd64.tar.gz"
rm "go$ver.linux-amd64.tar.gz"
Then adapt the office environment:
echo "export PATH=$PATH:/usr/local/go/bin:$HOME/go/bin" >> $HOME/.bash_profile
source $HOME/.bash_profile
And check that the installation went well:
go version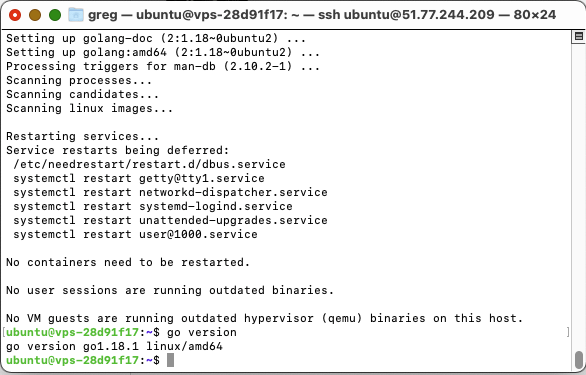
Let’s now launch into the Celestia ecosystem proper! To launch a Celestia node, you’re going to need to install the Celestia App (Celestia App), deploy the node’s back-end (Celestia-node), and organize the connections between these two utilities (with the Celestia Bridge).
Installing the Celestia app
Let’s start with the main Celestia app. Run the following command in your terminal, connected to your VPS:
cd $HOME
rm -rf celestia-app
git clone https://github.com/celestiaorg/celestia-app.git
cd celestia-app/
APP_VERSION=$(curl -s
https://api.github.com/repos/celestiaorg/celestia-app/releases/latest
| jq -r ".tag_name")
git checkout tags/$APP_VERSION -b $APP_VERSION
make install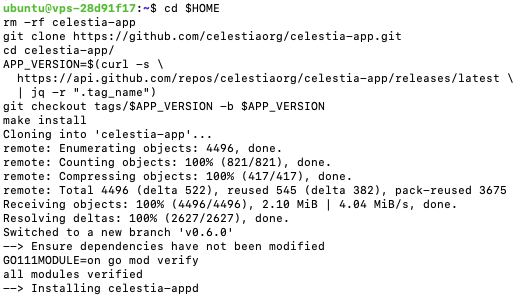
Wait for the VPS to grind, and give it time to install the application. When all the mess is over, you can check for proper installation with the command:
celestia-appd --helpCreate a Celestia wallet
Now, in order to be able to properly test the Celestia network, it’s going to be quite useful to generate a wallet directly from the command line. To create a wallet (and thus a private key and a public key), run the following command:
celestia-appd config keyring-backend testCreate a wallet itself using the following command:
celestia-appd keys add YourWalletName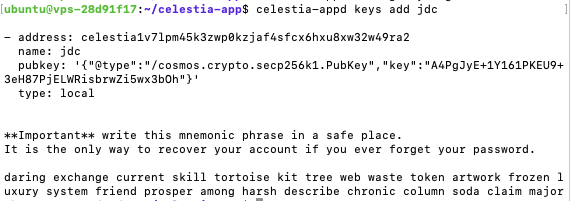
You will get the display of a public receiving address (address), your wallet name (name, in my case jdc), one of a public key (pubkey) and a private key, as well as a string of words that serve as the mnemonic phrase for Celestia’s testnet.
Check the existing wallets if you are creating multiple ones using the command:
celestia-appd keys listRecover Celestia testnet of developer for the following of your adventures
Now it’s time to grab some Celestia testnets from the official project Discord. Head over to the Celestia Discord, and send a message in the Faucet channel:
$request celestia1(YourPublicAddressCelestia)This, in my case, will result in:
$request celestia1v7lpm45k3zwp0kzjaf4sfcx6hxu8xw32w49ra2 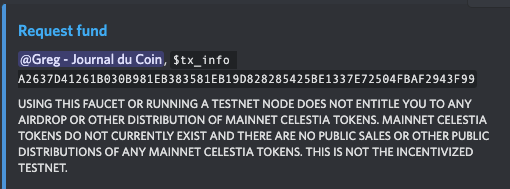
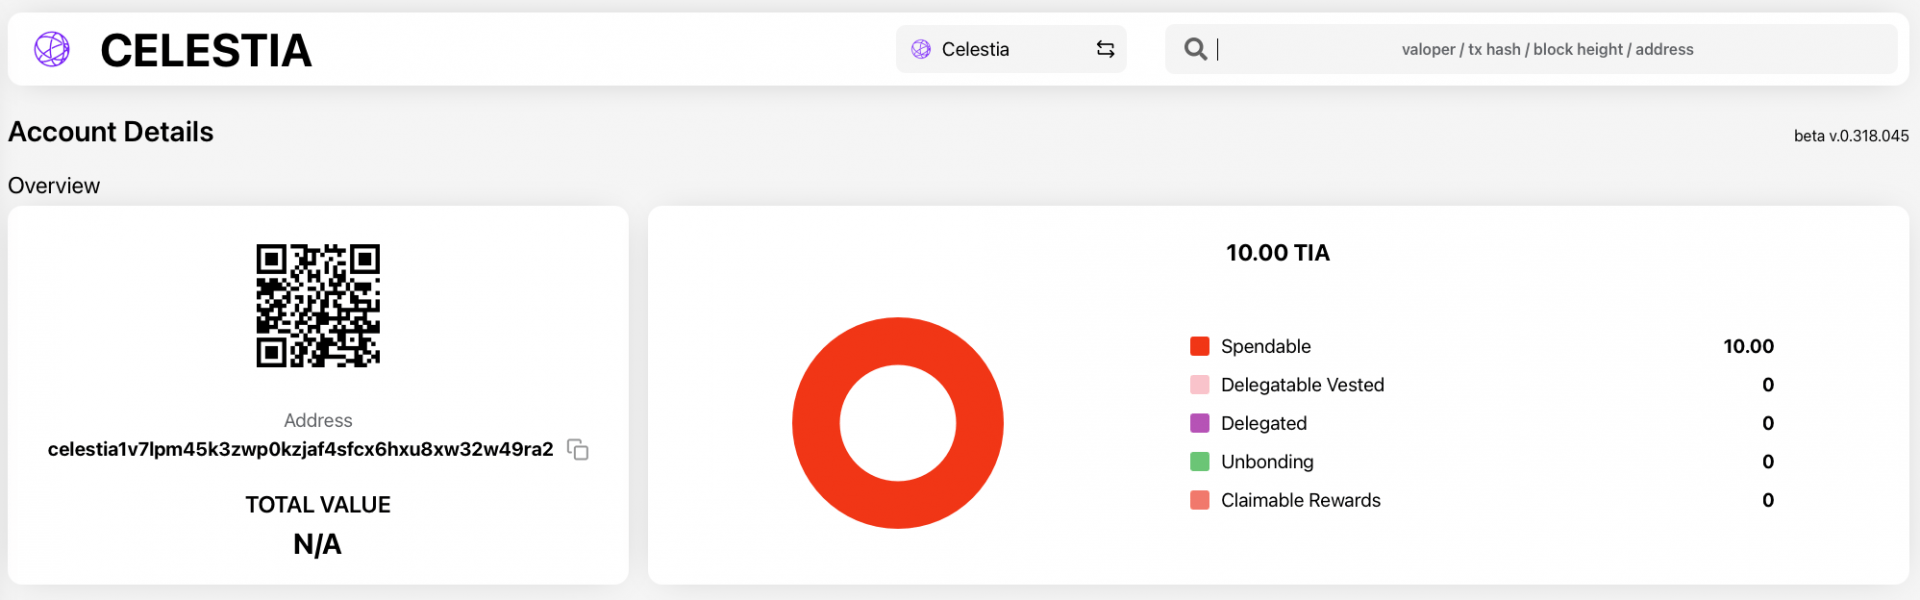
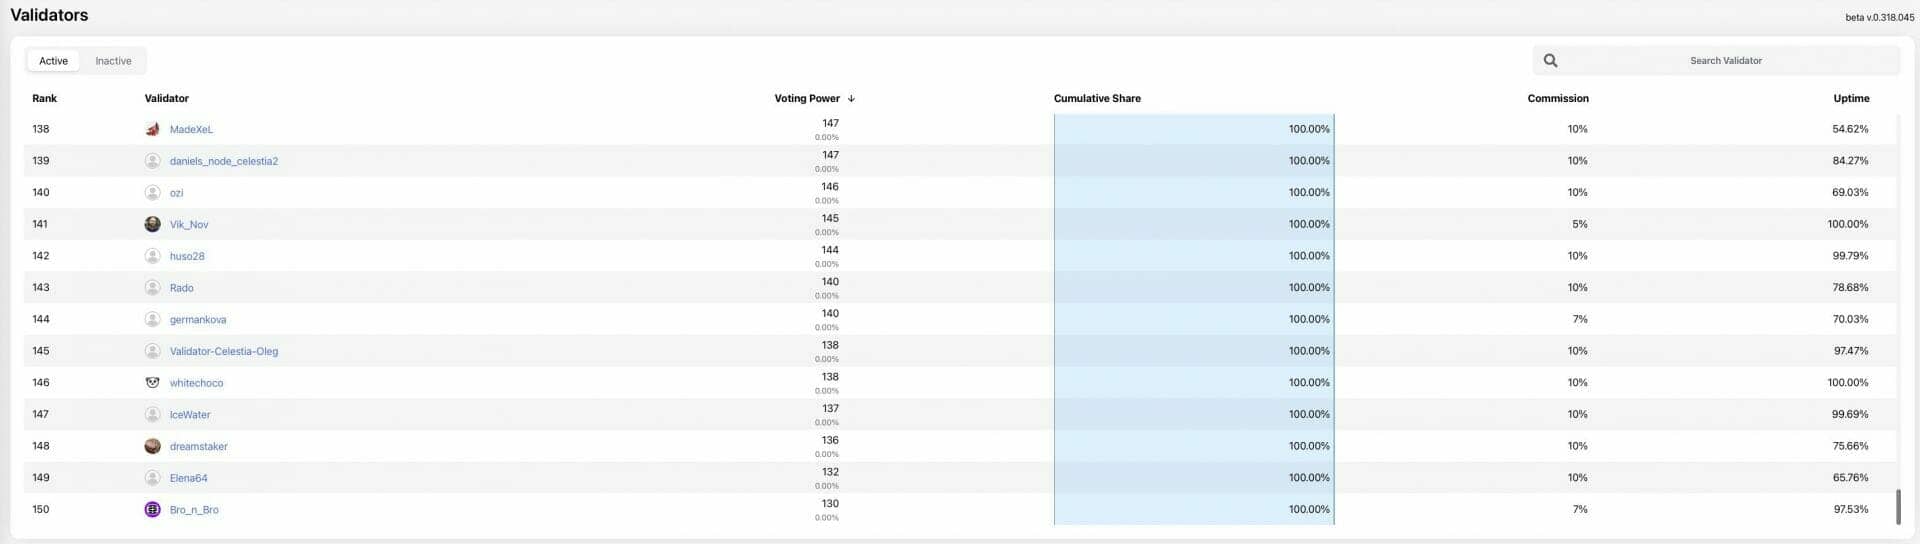
The Discord channel will then send you some developer tokens. Verify that these tokens have been received by exploring your Celestia public address with a blockchain explorer, like this one.
Here you are ready to continue installing the full Celestia node, with the goal of trying to become a network testnet validator. A small but important clarification: Celestia does not allow everyone to be a validator. Indeed, its validation mechanism is based on a set of “best” validators, i.e. those with the most tokens. At the moment and considering the progress of the testnet, you will not get enough tokens from the Faucet to become a real validator. The purpose of this article is therefore very mainly educational.
Installing the Celestia node
Deploy the Celestia node
Install the nuclear core of the Celestia node itself with this command:
cd $HOME rm -rf celestia-node git clone https://github.com/celestiaorg/celestia-node.git cd celestia-node/ git checkout tags/v0.3.0-rc2 make installAllow time for the VPS to download the data, compile and install.
Deploy the Celestia P2P network
Do the same thing for the Celestia P2P network. Go back to your main menu, clean up the useful directories and install the useful networks for Celestia with the command:
cd $HOME
rm -rf networks
git clone https://github.com/celestiaorg/networks.git
Now initialize the node by typing:
celestia-appd init "YourNodeName" --chain-id mamakiMore specifically, you can then choose a name for your node, and the command takes the opportunity to tell the Celestia client that you want to use the Mamaki testnet.
Next, let’s tackle the application configuration, addressing the useful configuration files:
cp $HOME/networks/mamaki/genesis.json $HOME/.celestia-app/configInitialize the connections that will allow to connect to other node operators, in order to retrieve and exchange Celestia blockchain datas:
BOOTSTRAP_PEERS=$(curl -sL https://raw.githubusercontent.com/celestiaorg/networks/master/mamaki/bootstrap-peers.txt | tr -d 'n') echo $BOOTSTRAP_PEERS sed -i.bak -e "s/^bootstrap-peers =./bootstrap-peers = "$BOOTSTRAP_PEERS"/" $HOME/.celestia-app/config/config.tomlConfigure the pruned mode and the validator mode for your Celestia node
In order not to devour the available storage space on your VPS completely and very quickly, let’s configure pruning for the blockchain in question: the pruning will allow you to consume less bandwidth and storage, keeping an overall smaller version of the blockchain in the long run. Use this command:
PRUNING="custom" PRUNING_KEEP_RECENT="100" PRUNING_INTERVAL="10"
sed -i -e "s/^pruning =./pruning = "$PRUNING"/" $HOME/.celestia-app/config/app.toml sed -i -e "s/^pruning-keep-recent =./pruning-keep-recent = "$PRUNING_KEEP_RECENT"/" $HOME/.celestia-app/config/app.toml sed -i -e "s/^pruning-interval =./pruning-interval = "$PRUNING_INTERVAL"/" $HOME/.celestia-app/config/app.toml
Next, switch to validator mode:
sed -i.bak -e "s/^mode =./mode = "validator"/" $HOME/.celestia-app/config/config.tomlFinally, update the node directly by uploading a snapshot of the blockchain. This snapshot at a point in time of the state of the blockchain will save you a lot of time: very quickly retrieved from your command terminal, it will allow your installation to rebuild the blockchain much faster than if you had to download and verify it independently all by yourself, from scratch. Use the following command:
cd $HOME
rm -rf ~/.celestia-app/data
mkdir -p ~/.celestia-app/data
SNAP_NAME=$(curl -s https://snaps.qubelabs.io/celestia/ | egrep -o ">mamaki.*tar" | tr -d ">")
wget -O - https://snaps.qubelabs.io/celestia/${SNAP_NAME} | tar xf - -C ~/.celestia-app/data/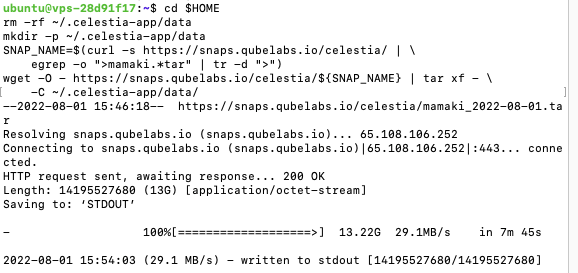
Configure the Celestia App service with systemd
To be on the safe side and not have to deal with starting and restarting the Celestia app in the future, integrate the app directly into a systemd service. Use the following command:
sudo tee <<EOF >/dev/null /etc/systemd/system/celestia-appd.service
[Unit]
Description=celestia-appd Cosmos daemon
After=network-online.target
[Service]
User=$USER
ExecStart=$HOME/go/bin/celestia-appd start
Restart=on-failure
RestartSec=3
LimitNOFILE=4096
[Install]
WantedBy=multi-user.target
EOF
Check the status of the service:
cat /etc/systemd/system/celestia-appd.service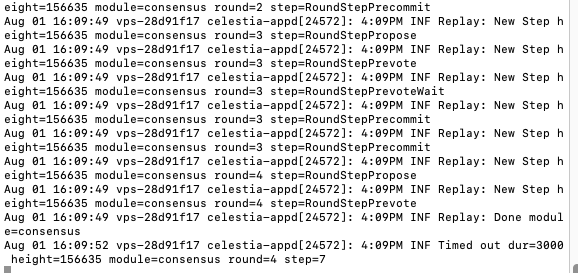
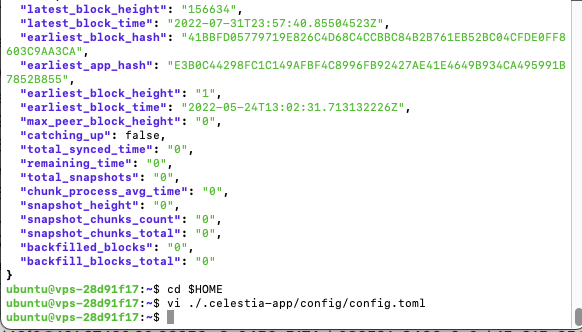
Then enter the following command:
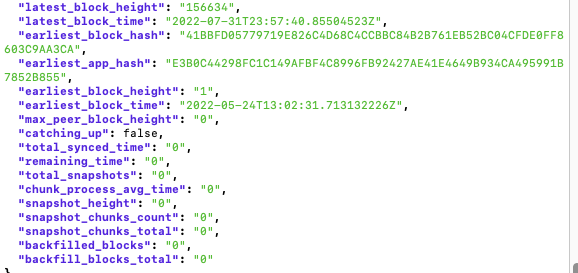
curl -s localhost:26657/status | jq .result | jq .sync_infoAnd check in the list that appears that ” catching_up : ” is set to ” false “: this will mean that you are up to date on the progress of the blockchain.
Now, let’s go back to the root of your VPS to continue installing the other parts of your node:
cd $HOMEConfiguring the Celestia app
Now let’s move on to configuring the Celestia app. Open the app configuration file, with a visual editor (vi), with this command:
vi ./.celestia-app/config/config.toml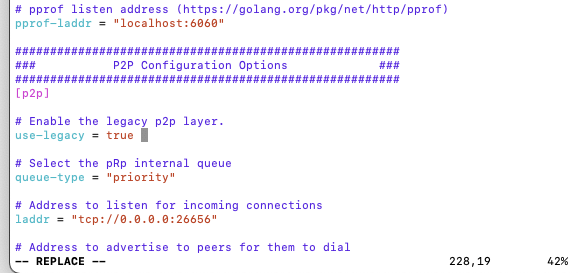
Press the R + shift key, to switch to replace mode. This will allow you to make changes directly in the document.
Make the following different changes in the document:
use-legacy = truemax-num-inbound-peers must be = "180"max-num-outbound-peers must be = "70"
max-connections must be = "250"
timeout-propose must be = "3s"timeout-commit must be = "25s"skip-timeout-commit must be = "false"
Press ” Escape ” to validate.
Then press the i + shift key to switch to insert mode. Go to the document and find the part about persistent peers and copy and paste this command:
[email protected]:43656,[email protected]:26656,[email protected]:36656,[email protected]:26676,[email protected]:26666,[email protected]:49656,[email protected]:26656,[email protected]:26656,[email protected]:26656,[email protected]:26656,[email protected]:26656,[email protected]:26656,[email protected]:26656,[email protected]:20356,[email protected]:26656,[email protected]:26656,[email protected]:26656,[email protected]:26656,[email protected]:36656,[email protected]:26656,[email protected]:26656,[email protected]:26656,[email protected]:26656,[email protected]:26656,[email protected]:26656,[email protected]:43656,[email protected]:43656,[email protected]:22656,[email protected]:26656,[email protected]:26656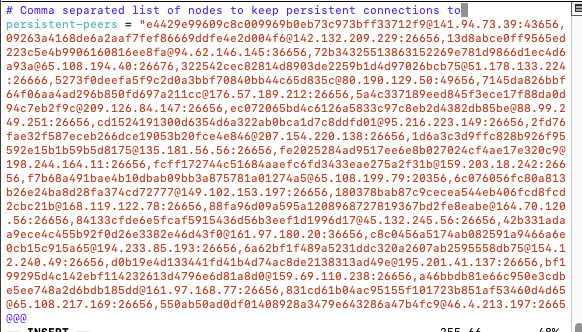
Then do ” Escape ” again to validate. Then type :e and validate to save the changes, then type :q and validate to exit the editor.
Restart it:
sudo systemctl restart celestia-appd.serviceAnd make sure it’s running properly:
curl -s localhost:26657/status | jq .result | jq .sync_infoDeploy the Celestia bridge
Let’s connect the applications that need to be connected by running the Celestia bridge: this bridge will link two layers of the network, the datas layer proper and the consensus layer. Run the bridge with the following command:
celestia bridge init --core.remote <http://localhost:26657> \--core.grpchttp://localhost:26657
celestia bridge start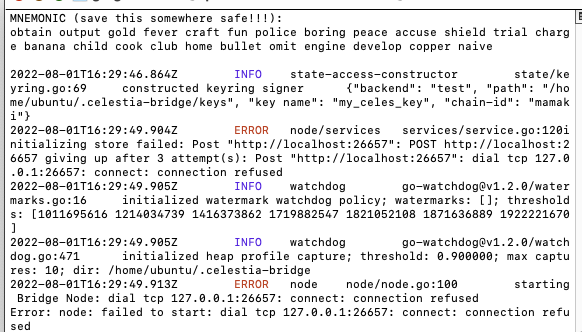
Configuring the Celestia Bridge Service with systemd
In the same way as with the Celestia application, use systemd to run the bridge service permanently on your VPS:
sudo tee <<EOF >/dev/null /etc/systemd/system/celestia-bridge.service
[Unit]
Description=celestia-bridge Cosmos daemon
After=network-online.target[Service]
User=$USER
ExecStart=$HOME/go/bin/celestia bridge start
Restart=on-failure
RestartSec=3
LimitNOFILE=4096[Install]
WantedBy=multi-user.target
EOF
Verify that everything is okay:
cat /etc/systemd/system/celestia-bridge.serviceFinally, start the celestia-bridge service:
systemctl enable celestia-bridge
systemctl start celestia-bridge && journalctl -u celestia-bridge.service -f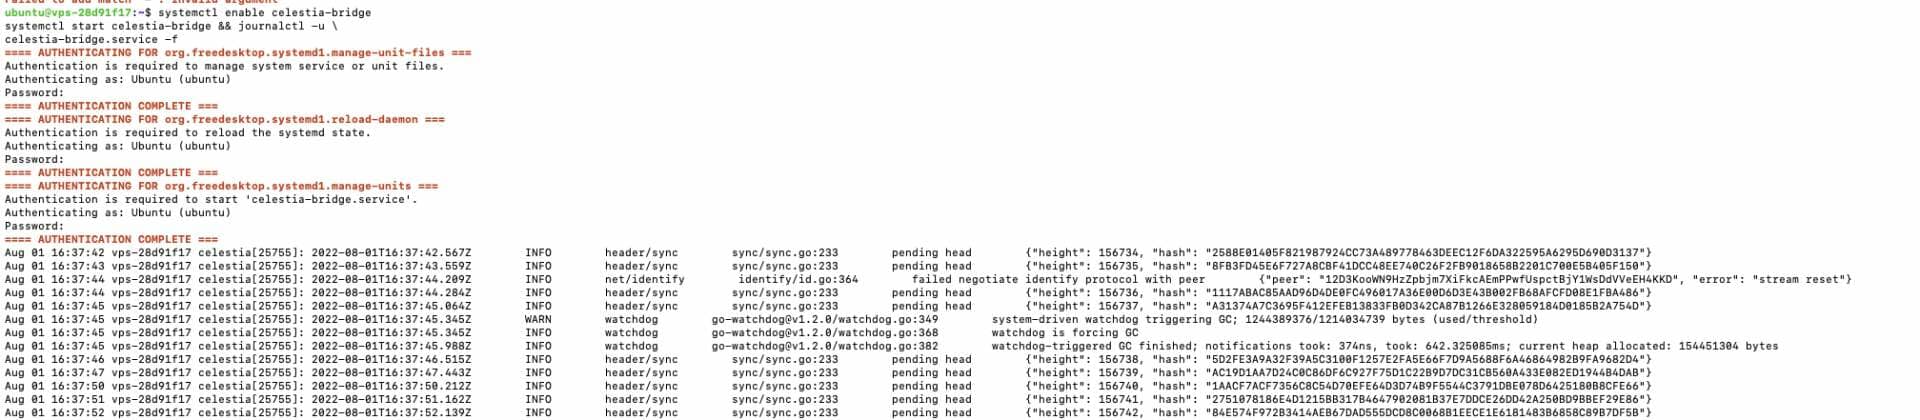
Delegate to your own Celestia validator node
Finally, and lastly, we’ll activate your validator, even though it will be purely for form’s sake, as we specified above.
Activating your Celestia on chain validator
To activate your Celestia on chain validator, you’ll need to retrieve some information, and issue some transactions. In your terminal, specify your Celestia wallet (VALIDATOR_WALLET=), then retrieve your celestiavaloper ID.
VALIDATOR_WALLET=YourCelestiaPublicAddress
celestia-appd keys show YourCelestiaPublicAddress --bech val -a
In my case, this will result in:
VALIDATOR_WALLET=celestia1v7lpm45k3zwp0kzjaf4sfcx6hxu8xw32w49ra2
celestia-appd keys show celestia1v7lpm45k3zwp0kzjaf4sfcx6hxu8xw32w49ra2 --bech val -a
Save the returned value somewhere. In my case, I get for example celestiavaloper1v7lpm45k3zwp0kzjaf4sfcx6hxu8xw32t286tv.
Now let’s activate your validator. To do this, enter the following command, tailored to your own data:
MONIKER=YourNodeName
VALIDATOR_WALLET=YourCelestiaPublicAddress
celestia-appd tx staking create-validator
--amount=1000000utia
--pubkey=$(celestia-appd tendermint show-validator)
--moniker=$MONIKER \
--chain-id=mamaki \
--commission-rate=0.1 \
--commission-max-rate=0.2
--commission-max-change-rate=0.01
--min-self-delegation=1000000 \
--from=$VALIDATOR_WALLET \
--keyring-backend=test
This in my case will result in:
MONIKER=Node-JDC
VALIDATOR_WALLET=celestia1v7lpm45k3zwp0kzjaf4sfcx6hxu8xw32w49ra2
celestia-appd tx staking create-validator
--amount=1000000utia
--pubkey=$(celestia-appd tendermint show-validator)
--moniker=$MONIKER \
--chain-id=mamaki \
--commission-rate=0.1 \
--commission-max-rate=0.2
--commission-max-change-rate=0.01
--min-self-delegation=1000000 \
--from=$VALIDATOR_WALLET \
--keyring-backend=test
If you encounter difficulties, with for example an error message about a dysfunctional RPC, or a connection refusal, it may be useful to add on a case-by-case basis --node https://rpc-mamaki.pops.one to ensure a functional RPC relay (or any other functional RPC for Celestia).
You will be asked to confirm, do ” yes “.

You will be able to verify the success of the operation on the Celestia explorer:
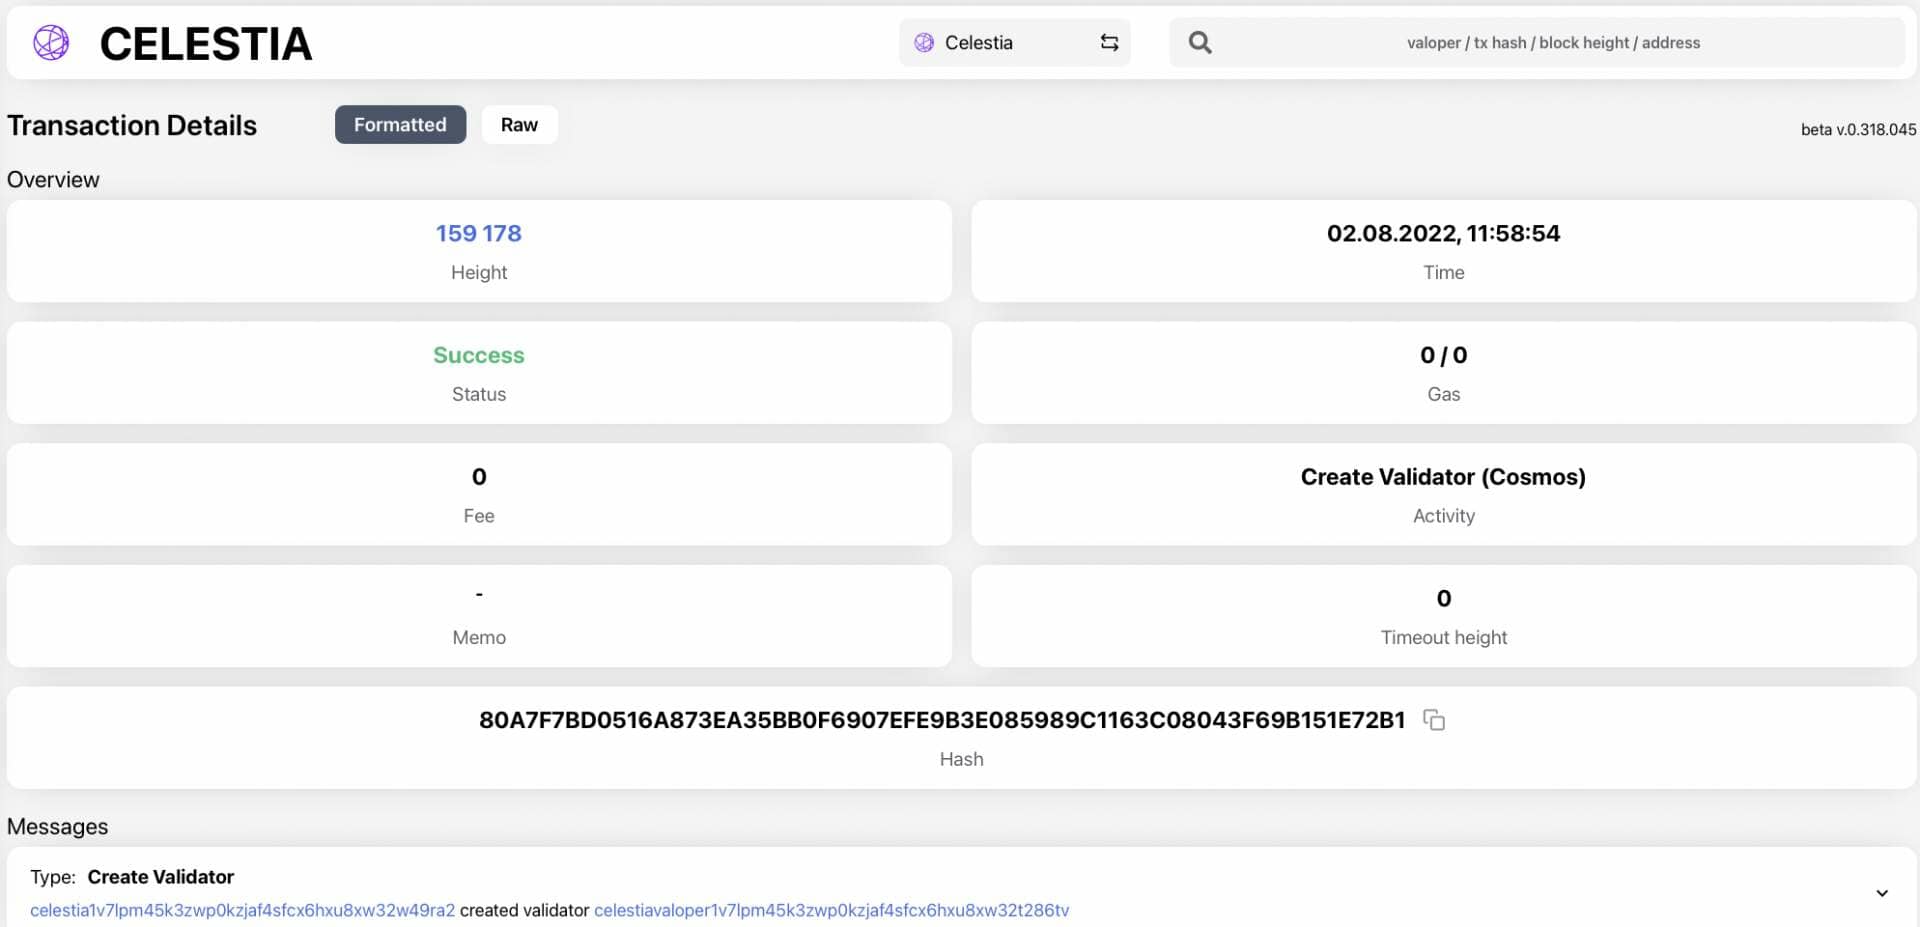
Finalize-delegation-on-chain-on-celestia
To conclude, delegate developer tokens with the following command, adapting it to your wallet and node:
celestia-appd tx staking delegate \YourCelestiavaloperID 9000000utia \--from=$VALIDATOR_WALLET --chain-id=mamakiIn my case, this will result in:
celestia-appd tx staking delegate \celestiavaloper1v7lpm45k3zwp0kzjaf4sfcx6hxu8xw32t286tv 9000000utia \--from=**celestia1v7lpm45k3zwp0kzjaf4sfcx6hxu8xw32w49ra2** --chain-id=mamaki
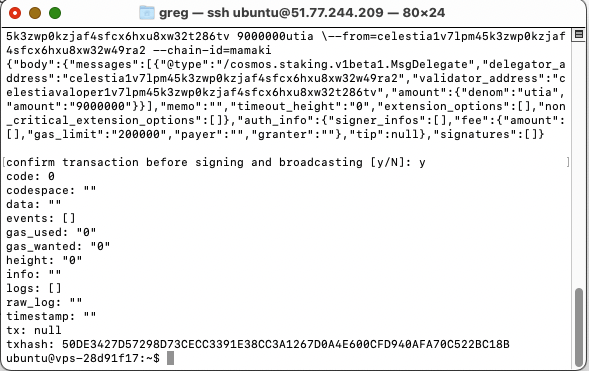
Confirm the transaction, and check this transaction and its validation on Celestia Explorer:
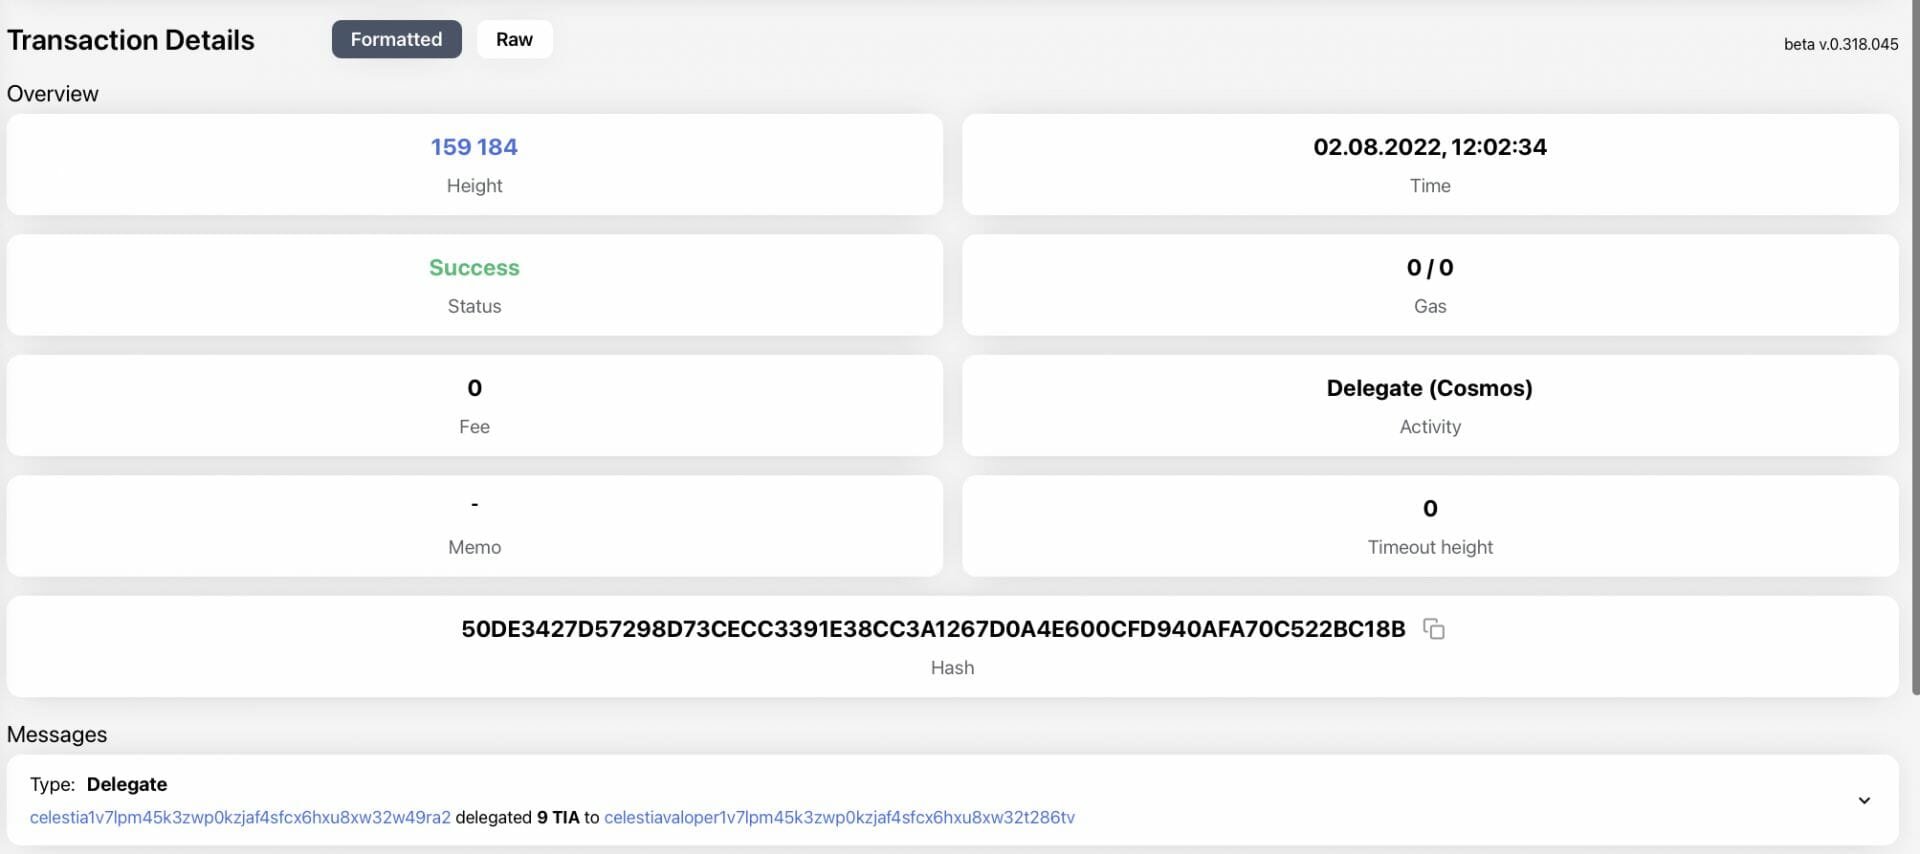
Tracking-the-functioning-of-your-celestia-node
And that’s it, the hard part is done, your Celestia node is online and working!
To check the status of your validator, you can use this command:
celestia-appd q staking validator celestiavaloper1v7lpm45k3zwp0kzjaf4sfcx6hxu8xw32t286tvFinally, to restart everything you have installed and deployed since the beginning of this article as needed, you can use systemd services, using the following command:
sudo systemctl enable celestia-bridge sudo systemctl daemon-reload sudo systemctl restart celestia-bridge && journalctl -u celestia-bridge -o cat -fThen use CTRL+C to exit the logs, when you have seen enough 🙂
Some errors may appear, for example failed negotiated may show up: in this case, it’s because some other nodes can’t connect to you, but you can give it time, it should normally fix itself.
If you want to check how much space is available on your VPS hard drive, you can also run the following (handy!) command:
df -h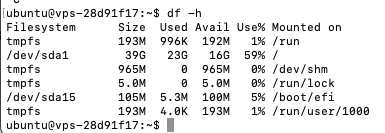
To delete everything if you want to empty your VPS, in order to launch other nodes for example if you run out of space, the easiest way will remain to reset your VPS directly from the configuration menu offered by the host you choose.
The Celestia team has therefore been trying to propose a small revolution in the world of blockchain: the ecosystem has accepted for a little while that its future would be multi-chain or not… But what if the real question was rather ” to be modular or not to be ? “
Let the Web3 fanatic apprentice developers be reassured: the innovative horizons offered by this solid and original architecture will probably bring great evolutions in the coming months… and it will be the occasion to talk about it in details in the columns of your favorite duck!