Mina’s blockchain is the lightest on the market, while seeking to ensure the protection and privacy of its users’ sensitive data. Today, we’ll go over the basics of the Mina network, learn together how to easily delegate your MINA tokens to a validator node on the network… and finally set up your own validator node on a VPS, if you feel like it!
Mina Protocol, the technical basics
Unfortunately, current blockchains are very large, on the order of several hundred gigabytes. This increases centralization, as it becomes increasingly expensive to operate a full node. The Mina protocol incorporates a complex cryptographic tool: the zero knowledge disclosure proofs. These are what allow the size of the blockchain to be drastically reduced. Thus, any user can maintain a complete node, even in case of intensive use of the network.
Mina Protocol therefore replaces the blocks of traditional blockchains with constant and very small cryptographic proofs, called zk-SNARKs. In addition to the advantages of decentralization, including an increased resistance to censorship, this architecture allows for several features, focused on data privacy of the network’s users.
In this network, several players coexist, most notably snarkers and stakers.
The “snarkers” produce the SNARKS certificates that allow the network to be validated and maintain the size of the chain at 22KB. They sell them to blockchain producers. The ” stakers ” or block producers recover the Snarks and include them in the blocks. They collect fees for their work.
The block producers select the transactions. They have an interest in favoring those with the highest fees, in order to maximize their gains. But they must also provide SNARK : the blockchain must remain ” succinct “.
In this ecosystem, MINA holders can either be very adventurous and try to stake their own MINAs on their validator node… or more simply delegate them to the validators of their choice, so that they can contribute to the validation of the network while being rewarded in MINAs!
Now that you’re up to speed with the technical side of the Mina protocol, let’s get practical!
In this article, I’m going to give you a comprehensive tutorial for learning how to run your own Mina Validator node in the cloud, if the urge strikes you. But it’s possible to make it much simpler directly, for those of you who aren’t big fans of command line fiddling. Indeed, it is simply possible to delegate your MINA tokens from your non-custodial wallet (like Auro Wallet, on mobile).
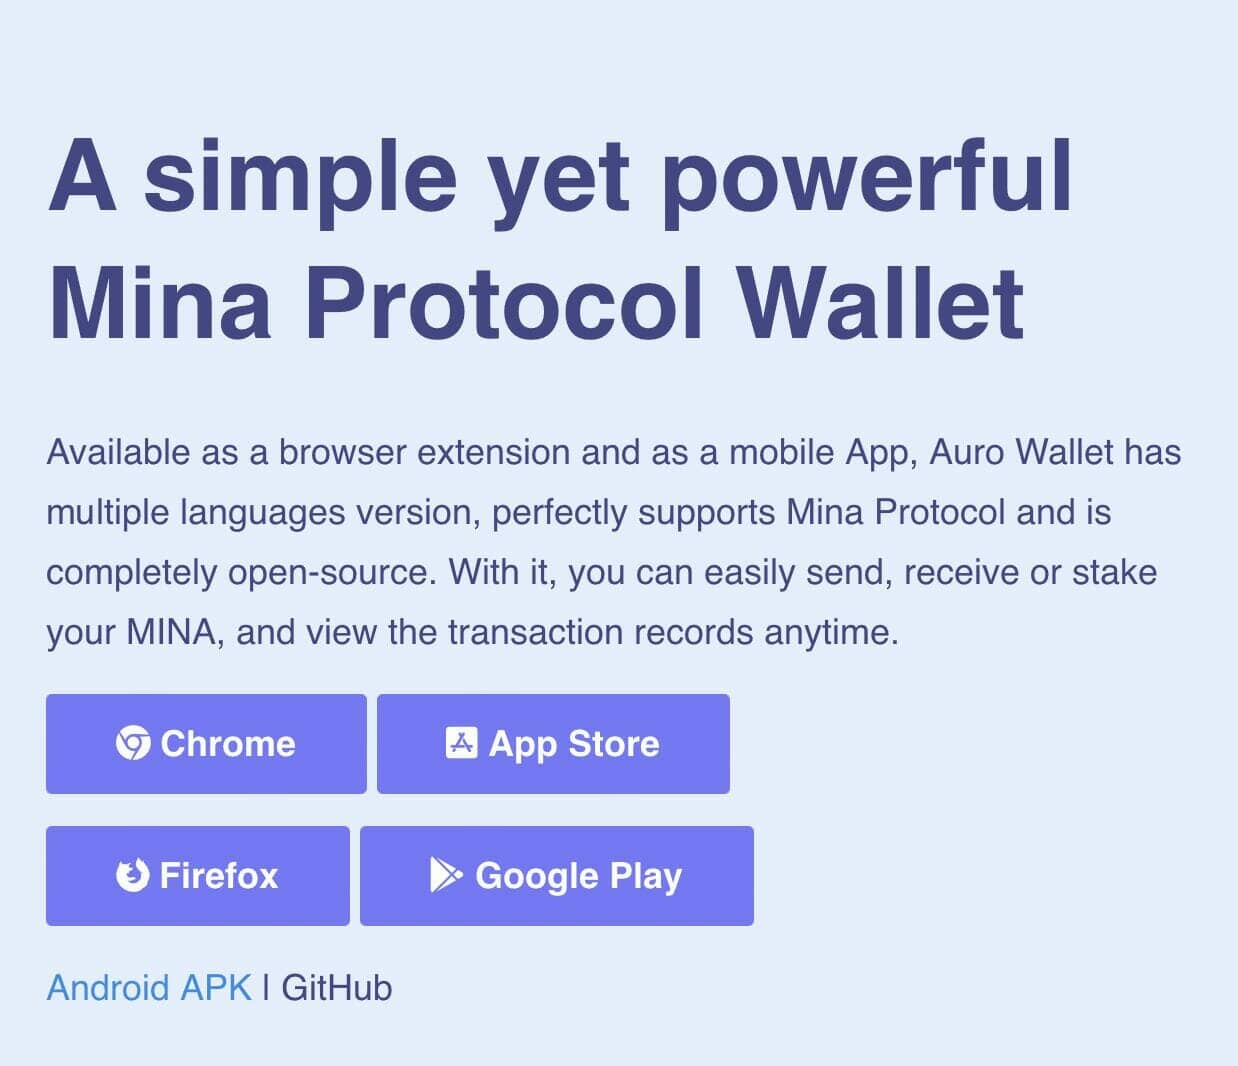
Install the Auro Wallet from your favorite app store on your mobile, generate a new wallet and drop MINA into it if you have any. Remember that creating a new address when you first deposit MINA mechanically and automatically costs 1 MINA. Make a note of the passphrase that is offered to you, so that you can recover your wallet and your funds in case of problems with your mobile.
Then press ” Staking “ to access the menu dedicated to the delegation of your funds.
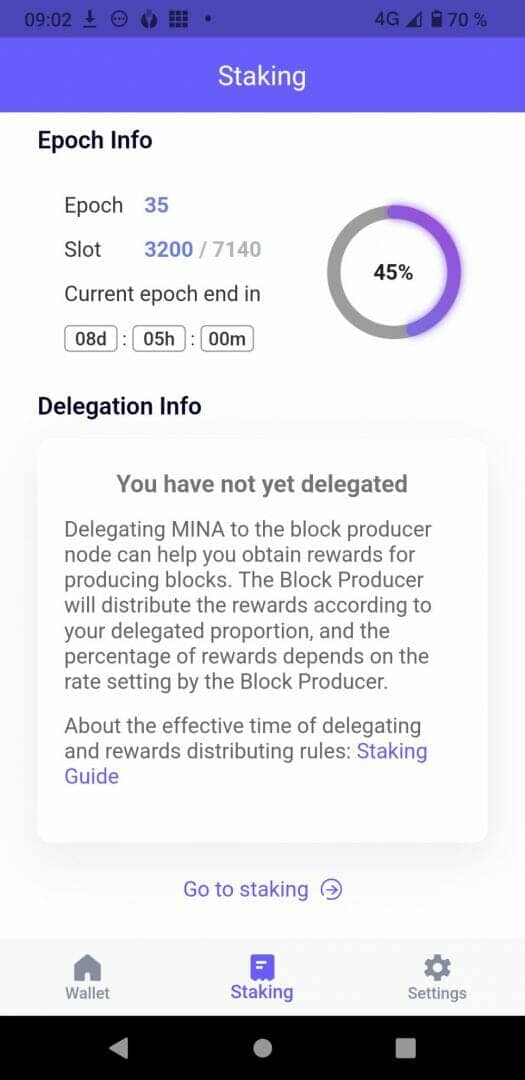
Press ” Go to staking ” to move to the next screen. You can then either choose one of the validator nodes referenced in the application, or enter the public address of another validator to delegate your tokens to them. For example, be aware that you can delegate your MINAs without losing control of them to our node, by delegating them to our validator.
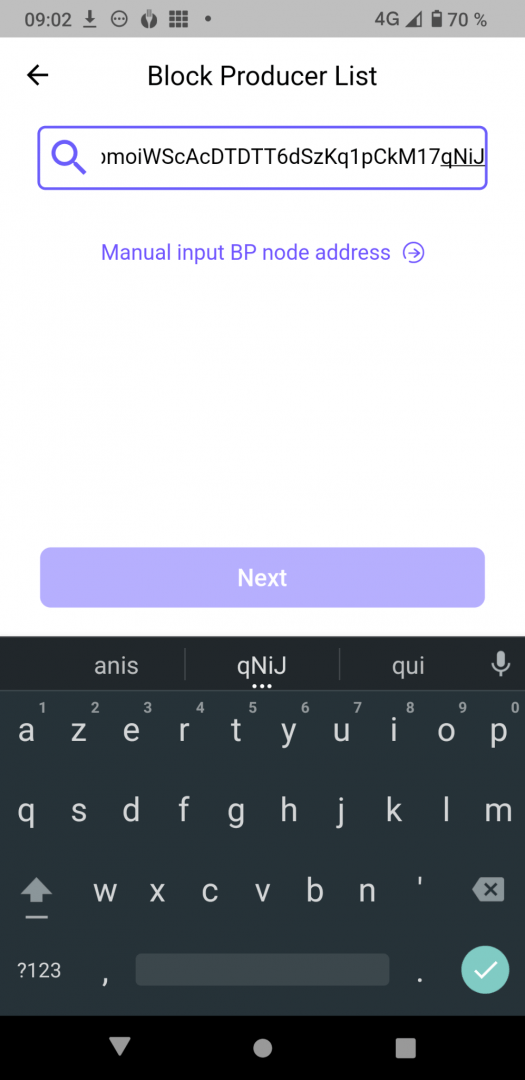
Copy and paste the address in the menu ” Block Producer List ” and choose ” Manual input BP node address “, then validate with ” Yes “.
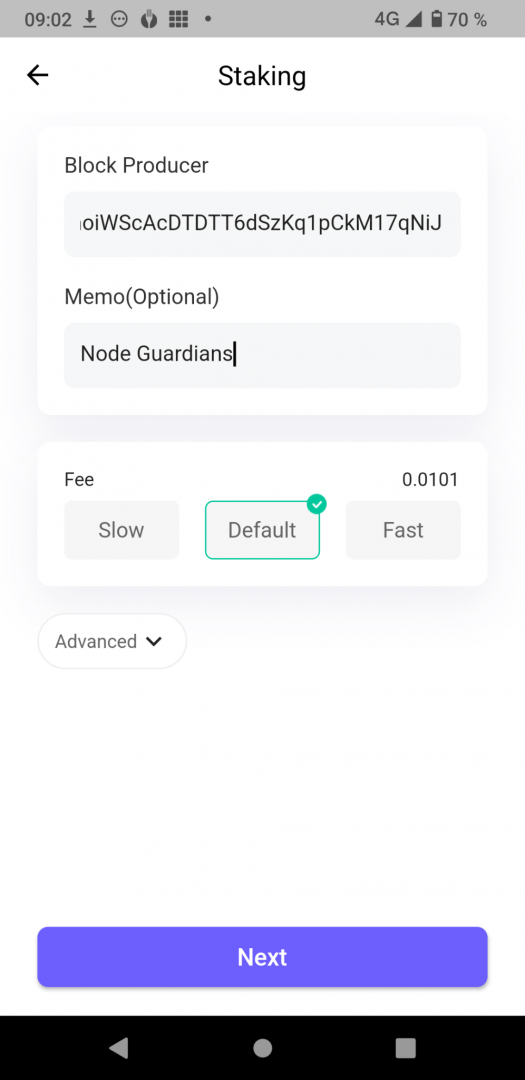
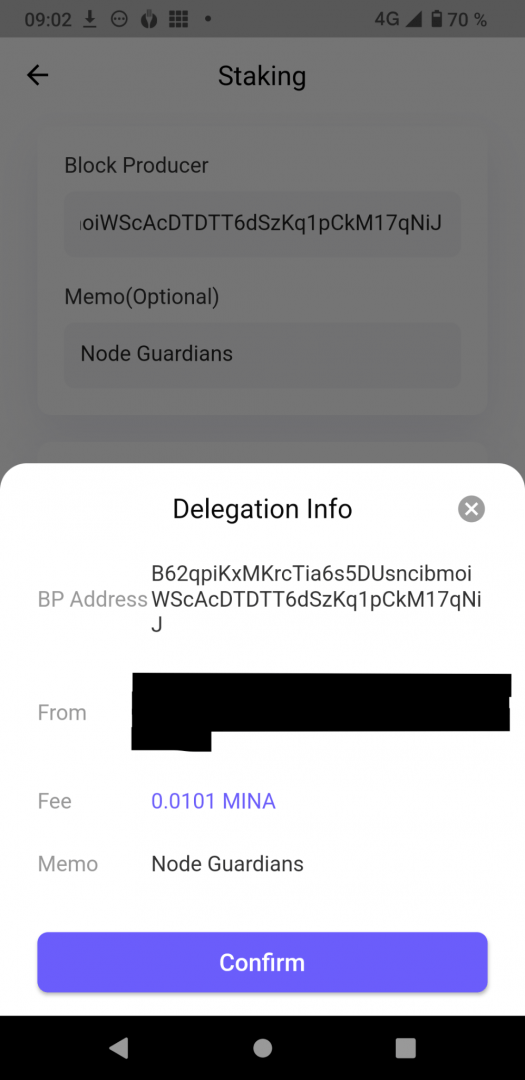
Copy and paste the address of our validator node again, add a little Memo to easily remember that this is our validator, choose the default fees… and validate!
Once the last staking transaction is confirmed, any funds you leave on your wallet will carry Mina Network interest (between 10-15% yearly, with no bonding period) as we validate Mina Network blocks for you.
Little bonus, and not the least: unlike the solutions offered by the centralized giants of the sector (such as Kraken or Binance), in addition to remaining totally in control of your funds, once this manipulation is performed once all the MINA you deposit on your Auro wallet will be automatically considered as staked!
How to set up a Mina validator node on a VPS
Today we will learn how to set up a Mina validator node on a VPS. For this, just like the previous episode of our series dedicated to validator nodes dedicated to the Celestia blockchain, I advise you to choose a VPS server from a dedicated provider, such as OVH or Contabo (cheaper, but lower quality). In my case, for this installation, I will reinstall my OVH VPS under Debian 11, but you can proceed to the same node installation using for example the latest version of Ubuntu.
ssh[email protected]The login address and login to be filled in depends on the hosting company. The login, connection address and attached password are communicated by your hosting provider in a summary email.
Step 1: Install the useful prerequisites and dependencies before starting
To get off to a good start, let’s grab and install the various tools that will be useful to us.
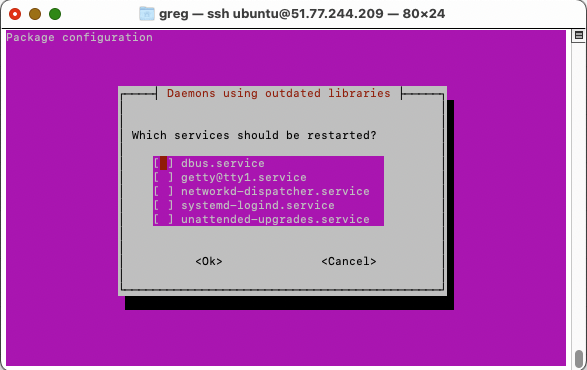
The update messages when installing certain utilities
A little warning to start with: as you install the utilities and packages needed to deploy your Mina node, the VPS you use may warn you that the installation system kernel (kernel) is not up to date. This is not a big deal!
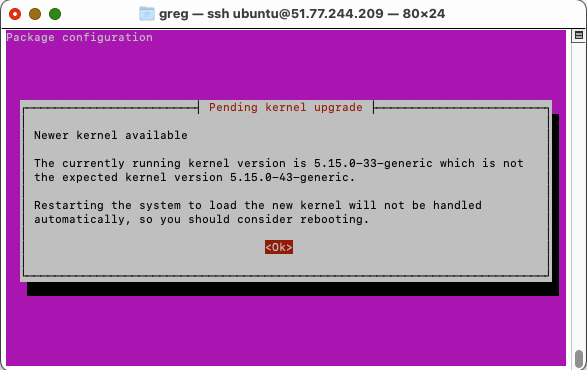
Just validate the two screens you will be presented with to continue with your installations, letting the VPS restart the relevant services.
Now that you’ve been warned, let’s get to work! Run the following command in your terminal to update your installation, and retrieve the basic utilities you will need for your Mina node:
sudo apt update && sudo apt upgrade -y
sudo apt install curl tar wget jq clang pkg-config libssl-dev jq build-essential git make ncdu -y
Next, install go:
ver="1.18.2"
cd $HOME
wget https://golang.org/dl/go$ver.linux-amd64.tar.gz
sudo rm -rf /usr/local/go
sudo tar -C /usr/local -xzf "go$ver.linux-amd64.tar.gz"
rm "go$ver.linux-amd64.tar.gz"
Then adapt the office environment:
echo "export PATH=$PATH:/usr/local/go/bin:$HOME/go/bin" >> $HOME/.bash_profile
source $HOME/.bash_profile
And check that the installation went well:
go versionNext, let’s install some specific dependencies that will be necessary for the proper compilation of the mina client, and that are not necessarily included as standard in the system installed on your VPS.
cd
mkdir -p #deps
cd deps
sudo apt update
wget http://de.archive.ubuntu.com/ubuntu/pool/main/libf/libffi/libffi6_3.2.1-8_amd64.deb
wget http://de.archive.ubuntu.com/ubuntu/pool/universe/j/jemalloc/libjemalloc1_3.6.0-11_amd64.deb
wget http://archive.ubuntu.com/ubuntu/pool/main/p/procps/libprocps6_3.3.12-3ubuntu1_amd64.deb
sudo dpkg -i *.deb
cd
rm -rf deps
Step 2: Install the Mina client and utilities
Continue by installing the mina-mainnet package:
sudo apt update
sudo apt-get install -y curl unzip mina-mainnet=1.1.5-a42bdee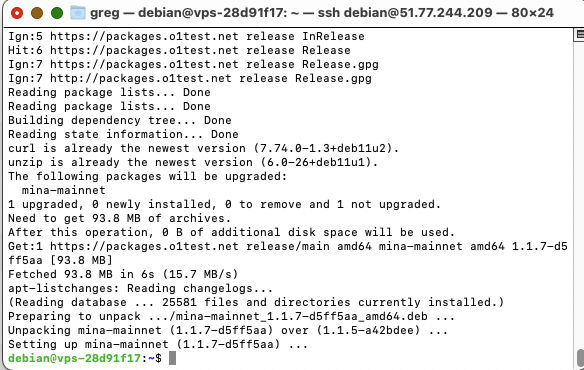
Then install the Mina wallet generation utility:
sudo apt-get install mina-generate-keypair=1.1.5-a42bdee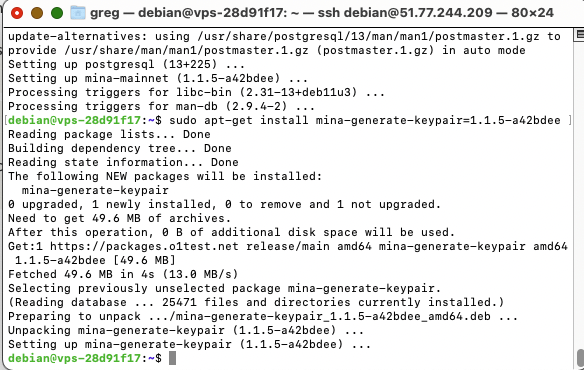
To create a wallet (and thus a private key and a public key), run the following command:
mina-generate-keypair -privkey-path ~/keys/my-walletThe terminal will ask you to attach a password to it: choose it well and above all write it down correctly somewhere!
Set the rights attached to the generated keys:
chmod 700 $HOME/keys
chmod 600 $HOME/keys/my-wallet
Check the password you wrote down (this is important!):
mina-validate-keypair -privkey-path ~/keys/my-wallet
Finally, adapt the office environment:
echo 'export KEYPATH=$HOME/keys/my-wallet' >> $HOME/.bashrc
echo 'export MINA_PUBLIC_KEY=$(cat $HOME/keys/my-wallet.pub)' >> $HOME/.bashrc
source ~/.bashrc
Step 3: Install the firewall (firewall)
Now let’s configure the firewall for your VPS, by installing ufw:
sudo apt-get install ufwNext, configure the useful rules for the ports used by Mina:
sudo ufw allow 22
sudo ufw allow 8302
&& sudo ufw allow 8303
&& yes | sudo ufw enable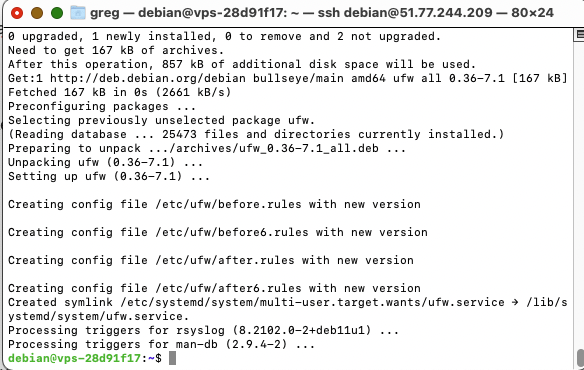
Calm down quietly to make sure everything is working with the following command:
sudo ufw statusStep 4: Install and configure the Mina environment
Let’s now move on to the actual installation of Mina. To start, let’s remove any previous versions of a previously failed installation:
sudo apt-get remove -y coda-testnet-postake-medium-curvesLet’s create a configuration file for Mina, with the following command:
mkdir .mina-configAnd let’s download from 01 Labs the packages that will be useful to us:
sudo apt-get remove -y mina-testnet-postake-medium-curves
echo "deb [trusted=yes] http://packages.o1test.net release main" | sudo tee /etc/apt/sources.list.d/mina.list
sudo apt-get update
sudo apt-get install -y curl unzip mina-mainnet=1.1.7-d5ff5aa
Let’s get the peers that our validator node will connect to in order to download the Mina blockchain, and then continuously validate it:
curl https://storage.googleapis.com/mina-seed-lists/mainnet_seeds.txt > ~/peers.txtnano .mina-envCODA_PRIVKEY_PASS="YourKeyPassword"
EXTRA_FLAGS=" -file-log-level Debug"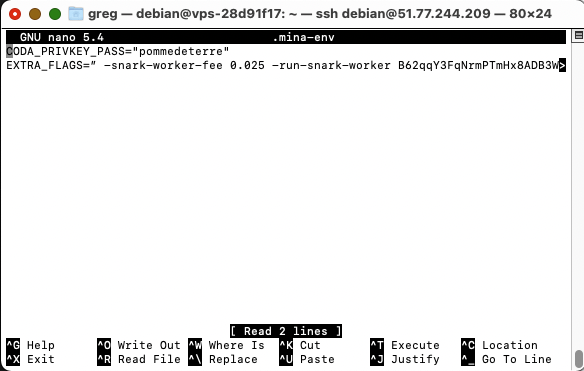
Save it and exit, by doing CTRL+S and then CTRL+X.
Step 5: Start your Mina validator node in background with SystemD
To be on the safe side and not have to deal with starting and restarting your Mina node in the future, integrate the application directly into a systemd service. Use the following command:
systemctl --user daemon-reload
systemctl --user start mina
systemctl --user enable mina
sudo loginctl enable-linger
Check the logs to make sure the client has started:
journalctl --user-unit mina -n 1000 -f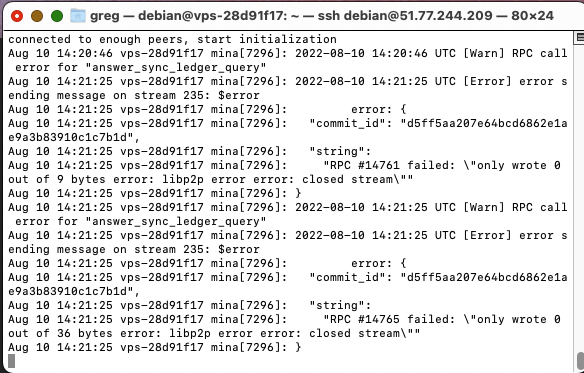
At first, you should get various error messages, including RPC errors.

This is normal for a while (which may be a bit long): your node starts up, and it will normally eventually start downloading and validating its first copy of the Mina blockchain (Bootstrap).
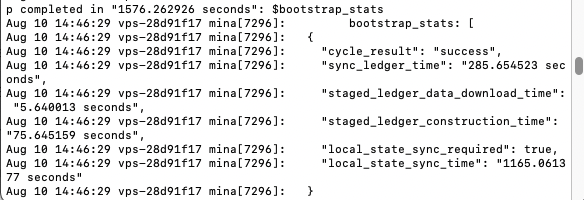
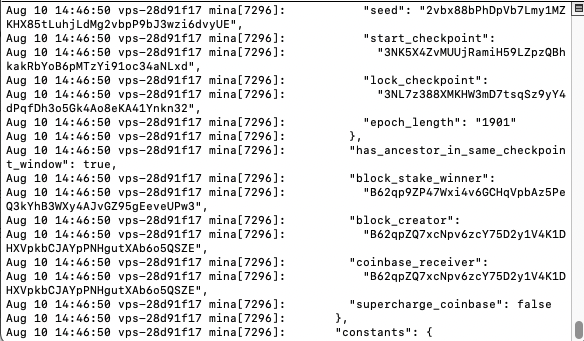
After a while, the logs will start showing the current state of the blockchain, including recent blocks that your node will validate.
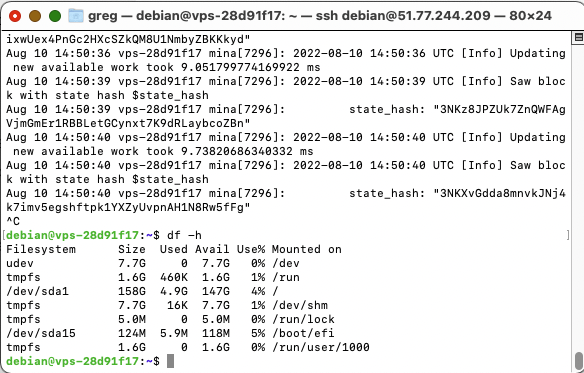
Exit batches by doing CTRL+C and now check the status of the Mina client and the various network data directly retrieved by your Mina node:
mina client statusPlease wait a few moments as the command does not return an immediate response.
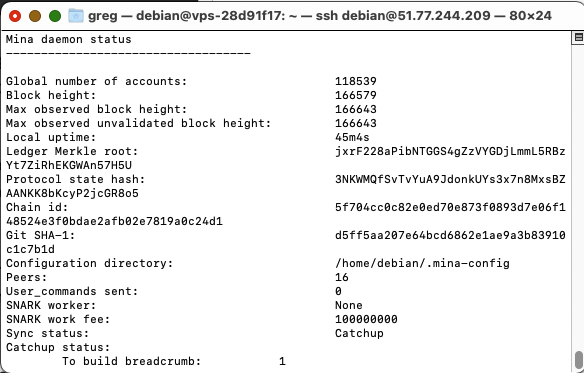
And there you have it, you’ll be able to find the number of existing blocks on the entire Mina blockchain (Max observed block height) as well as where you are on your own node’s side (Block height). You will also be able to know if your node has finished synchronizing and retrieving and validating the whole Mina blockchain: for this, you will just have to look at the Sync status line: during the first synchronization it will show you Catchup, once the synchronization is over it will show ” Synchronised “.
Step 6: Install a portable clock for your node
The Mina teams recommend installing a portable clock for better reliability of your node. So we will install the NTP utility. Accurate time keeping is very useful for various reasons when administering a server. Even though in our specific case, this tutorial is not intended to make you deposit large amounts of MINA on your command line wallet, we will install it to go through with the experimentation. Use the following commands:
sudo apt-get update
sudo apt-get install ntp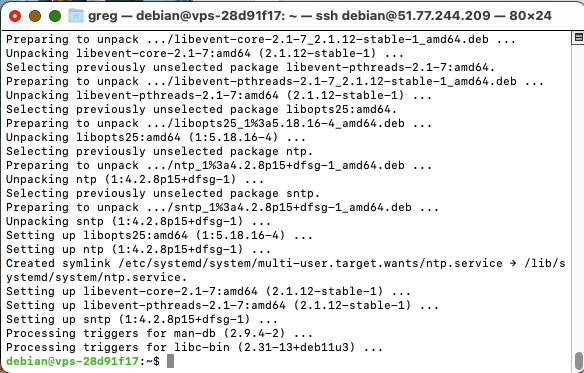
Then the following commands:
sudo systemctl restart ntp
sudo systemctl status ntp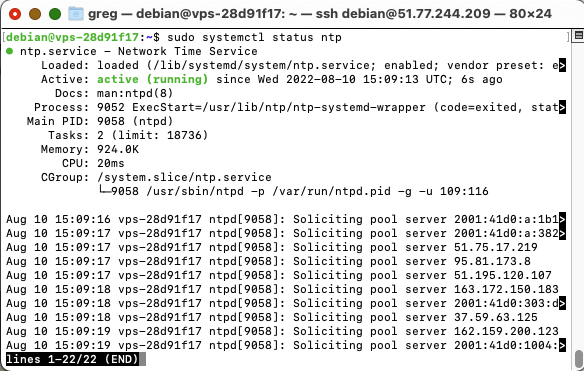
Finally let’s install and then configure ntpdate, another component of our portable clock:
sudo apt-get install ntpdate
sudo nano /etc/ntp.conf
In this configuration file, add the line:
server 10.1.1.1 prefer iburst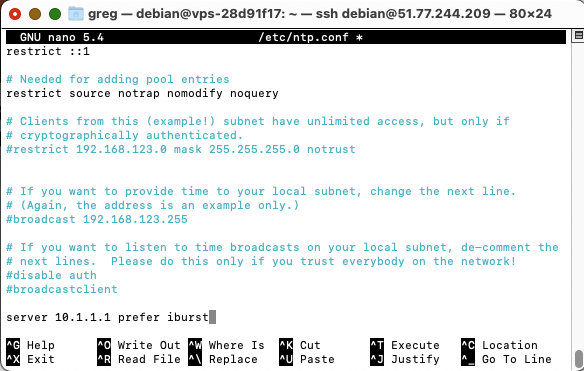
Then save and exit, by doing CTRL+S then CTRL+X. Finally, restart ntp:
sudo systemctl restart ntpAnd finally, check that everything is working by viewing the logs, with the command:
ntpq -p
Mina staker directly on its node and attempt to validate blocks
You now theoretically have a working node that is ready to validate blocks. You can also make it functional to produce snarks (i.e., participate in compressing the data of the Mina blockchain, to allow it to keep its maximum target size of 22kb.
Configure your Mina client to allow you to snark:
mina client set-staking --public-key YourMinaPublicAddressVerify that a staking account is available with the command:
mina client status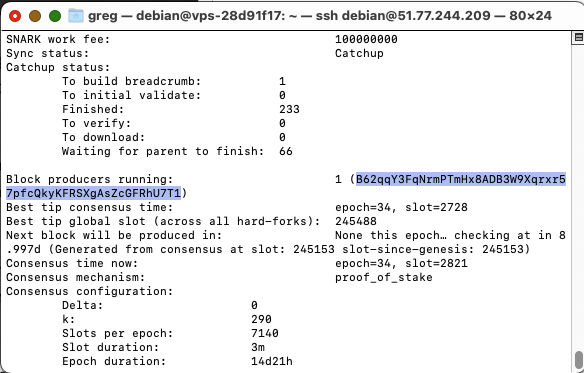
Launch Snark Worker on your node as a background
Modify the Mina environment configuration file with:
sudo nano .mina-envThen add this line:
EXTRA_FLAGS=" -snark-worker-fee 0.025 -run-snark-worker YourPublicAddressMina -work-selection seq -file-log-level Debug"Which in my case resulted in:
EXTRA_FLAGS=" -snark-worker-fee 0.025 -run-snark-worker B62qqY3FqNrmPTmHx8ADB3W9Xqrxr57pfcQkyKFRSXgAsZcGFRhU7T1 -work-selection seq -file-log-level Debug"
Then save and exit, by doing CTRL+S then CTRL+X.
Installing the TMUX dedicated session manager
To avoid overloading the operational capabilities of your node (which might not take too kindly to having to both produce blocks and produce snarks), you should install tmux. Use the following command:
sudo apt install tmux -y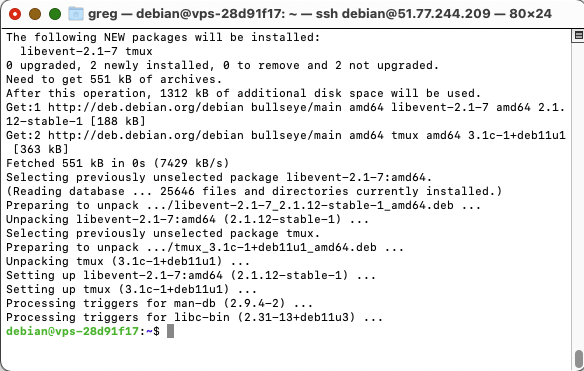
Test launching a background session, with:
tmux new -s session1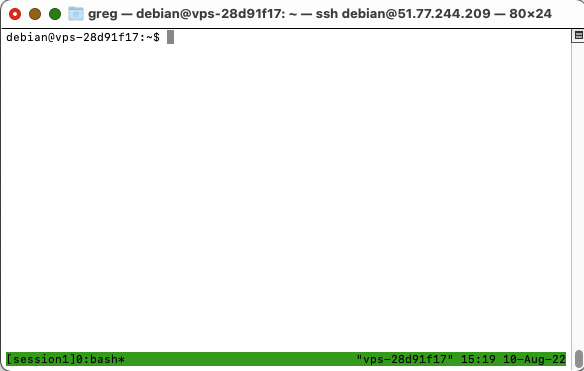
Then exit with CTRL+B then the D key.
Finally, to kill the session:
tmux kill-session -t session1Install a Snark-Stopper to avoid saturation of your node
Once you have this tmux handler installed, you will be able to configure a snark-stopper, a sort of safety valve that will cut off your snark production if it were to impact the proper functioning of your Mina block validator node.
sudo apt-get update
sudo apt-get install python3-venv tmux git -y
git clone https://github.com/c29r3/mina-snark-stopper.git
cd mina-snark-stopper
python3 -m venv venv
source ./venv/bin/activate
&& pip3 install -r requirements.txt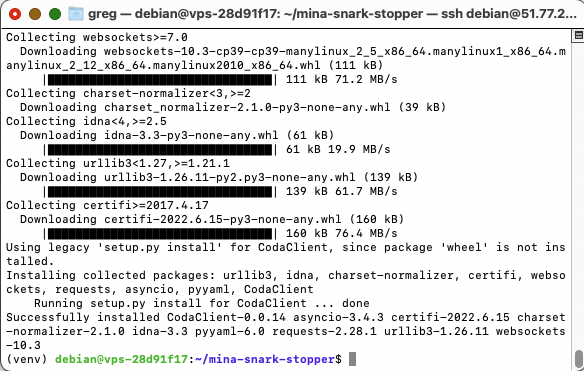
Edit the config file with your node info, with the following command:
sudo nano $HOME/mina-snark-stopper/config.yml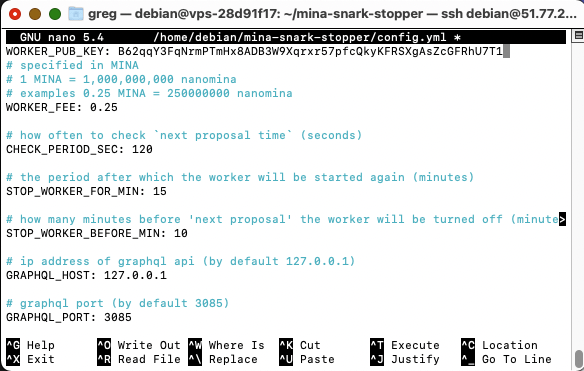
Adapt the WORKER_PUB_KEY with your validator public address that you previously retrieved (with the mina client status command), and lower the WORKER_FEE to 0.025.
Finally, run the Snark Stopper with the following command:
tmux new -s snark-stopper -d venv/bin/python3 snark-stopper.pyStake your MINAs on your command-line node
If you have deposited some MINAs on your command line wallet created for this tutorial, you can now enable MINA staking. Remember that there is a wallet creation fee of 1 MINA on the first deposit, still. Run the following command:
mina account unlock --public-key YourPublicAddressMinaThen to automatically delegate funds available on your wallet to you, run:
mina client delegate-stake --receiver <DELEGATE-PUBLIC-KEY> \ --sender $MINA_PUBLIC_KEY --fee 0.1
Delegate your MINAs to another command-line Mina validator
If you want to delegate the funds held on your command-line wallet to another validator, locate that validator’s Block Producer address and use the following commands:
mina account unlock --public-key YourMinaPublicAddress Then delegate the funds available on your wallet to another wallet:mina client delegate-stake --receiver <PublicKeyOfValidatorSelected> \ --sender $MINA_PUBLIC_KEY --fee 0.1
For example, know that you can delegate your MINAs without losing control of them to our node, by delegating them to our validator
Send MINA from your node to another Mina wallet (like Auro Wallet)
Finally, if you want to withdraw funds from your wallet on the command line (although I’ll reiterate just for the sake of argument not to deposit large amounts of MINA there for safety), use the following command:
mina accounts unlock --public-key YourPublicAddressMinaThen use this command tailored to your receiving address:
mina client send-payment --amount 1.5 --receiver PublicFundsReceiptAddress --fee 0.1 --sender YourPublicAddressFinally, you can update your validator node with the following suite of commands. Before engaging them, make sure you have retrieved your MINAs from an external wallet for safety, to cover any eventuality 🙂
systemctl --user stop mina
sudo apt-get remove mina-testnet-postake-medium-curves
echo "deb [trusted=yes] http://packages.o1test.net release main" |
sudo tee /etc/apt/sources.list.d/mina.list
sudo apt-get update
sudo apt-get install -y
curl unzip mina-mainnet=LastReleaseNumber
wget -O ~/peers.txt https://storage.googleapis.com/mina-seed-lists/mainnet_seeds.txt
And to conclude, restart the various clients, while viewing the logs to verify that everything is fine:
systemctl --user daemon-reload
systemctl --user restart mina
journalctl --user-unit mina -n 1000 -f
You’re all set to further explore the technical innards of the Mina blockchain! For the more curious who would have made it to the end of this tutorial, you can indulge in one last command – df -h – to see the ridiculous size Mina occupies on your VPS. When Mina advertises itself as the lightest blockchain, you can see that it’s a qualifier it doesn’t usurp!